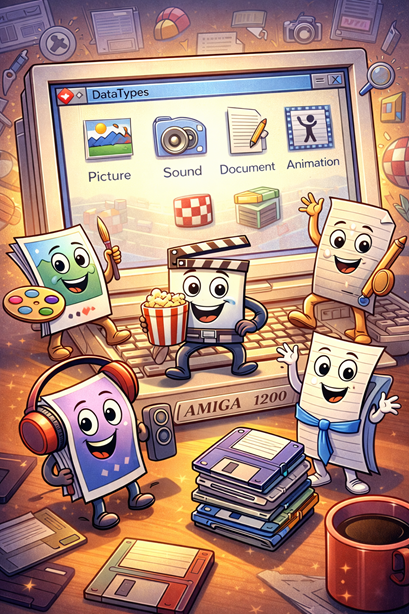
As you might know, DataTypes on the Amiga is a universal system for managing files in different formats. This lets an application query the datatypes.library to load or save a file, while the OS takes care of converting the format. If a user installs new DataTypes on their computer, all existing programs using the DataTypes system will instantly work with the new format.
Happy happy DataTypes.
For a more in-depth explanation on how to use DataTypes in your application, I suggest checking out this link:
Since DataTypes are based on BOOPSI, a DataType object essentially is as a Gadget and can therefore be added to a Window. This isn’t the approach I’m aiming for in this article. Instead, I’ll demonstrate how to load an image from a file and populate a BitMap for further processing with graphics.library. The example below will open a window, load a .png file, and copy it to the window’s rastport for display. The result is a small program that’s similar to the MultiView utility, but much simpler.
When using datatypes.library, it’s a good idea to test your code on different versions of AmigaOS. For example, ApolloOS will automatically handle high-color images, while AmigaOS 3.2 needs to be explicitly told to use newer modes. These small differences between AmigaOS variants can be tricky to anticipate without thorough testing.
Support for high-color pictures was introduced in datatypes.library version 43, which means you’ll need AmigaOS 3.5 or later. You can refer to this table to see which versions of DataTypes are included in different AmigaOS releases.
OS
version of datatype.library
AmigaOS 3.0
v39
AmigaOS 3.1
v40
AmigaOS 3.5
v43
AmigaOS 3.9
v44
AmigaOS 3.2
v47
ApolloOS
v45
I’ll let the actual source code speak for itself. Here’s how to load pictures into a Bitmap using DataTypes in assembler.
MUI, or Magic User Interface, is a popular UI system on the Amiga that offers users an attractive and consistent interface to work with. For developers, it delivers an object-oriented way to code UIs, with perks like automatic layout management and simple Arexx integration.
MUI
MUI coding is an advanced topic, but one that’s worth learning properly. There’s no doubt MUI was designed with C programmers in mind, and little has been done to accommodate those of us who prefer assembler syntax. The MUI development package hides much of its functionality behind C macros and libraries, making it tricky to find documentation on how it really works. That’s the kind of insight assembler coders need.
I highly recommend checking out the developer guide and autodocs included with the MUI developer package. They offer a solid understanding of how the system works. Here, I’ll highlight the parts specific to the assembler and share examples you can use as a starting point for your own applications.
To get started, we need to open “muimaster.library”. Although MUI objects are technically Intuition BOOPSI classes, we should use MUI functions to create new objects and set their attributes. Another important thing to note is that the UI is built from the bottom up. That’s why, in the later example, we start by creating the buttons and text, then the groups they belong to. Only after that do we create the window, and finally, the application to host everything. The reason for this is that each object we create needs to have a pointer to its children. As a result, when we create our window, for example, the application isn’t ready yet. This means we can’t actually open the window at that moment. We need to build the entire chain of objects first, then open the window using _LVOMUISetAttrsA.
Creating new objects is done using the _LVOMUINewObjectA function. Like other functions ending with a capital “A,” its attributes are provided using a taglist. In the example, I use my own macros to build a taglist on the stack. They’re the same ones I’d use with, for instance, _LVOOpenScreenTaglist, which is actually an alias for _LVOOpenScreenA, by the way.
Every new object we create needs to be of a MUIC_<class>. In the C documentation for MUI, you’ll see references to MUIC_Window, MUIC_Text, and so on, but these don’t appear in the assembler includes. The fix is to add the necessary classes ourselves in the assembler source. These aren’t constants representing numbers like other labels, but pointers to strings containing the class names. Here is how it’s done in assembler:
One big advantage of having the entire application and its UI as a single chain of objects is that when it’s time to exit and clean up, we just make one call to _LVOMUI_DisposeObject with our application as the parameter. MUI will then automatically close all its child objects and free up all used resources in one go.
With our application and its UI elements now created and visible on screen, it’s time to add functionality to bring everything to life. The ideal MUI application has a minimalistic event handler that only checks whether the program should quit or continue running. All other functionality should be added as hooks to the UI elements, with MUI handling the calls to these routines. This is exactly the approach we took in the example.
Important: When MUI calls your hook, don’t assume any data will be in the CPU’s registers. Retrieve all necessary parameters from variables or memory locations, and be sure to save and restore any registers you use on the stack.
In object-oriented programming, the functions an object can perform are called “methods”. In MUI, these methods are invoked using the DoMethod() command. However, DoMethod() isn’t actually an AmigaOS function; it resides in a linker library used by the C compiler, making it not particularly useful for assembler coders. To rub salt in the assembler coders’ wounds, the documentation on how to manually invoke these methods is flat-out wrong.
Here is what needs to be done:
Make a list of methods and their parameters stored in memory or on the stack.
Point a1 to this list
Point a2 to the relevant MUI object
Point a0 to the objects hook
execute h_entry from the hook
	movea.l	mt_MUI_Application(a5),a2
	movea.l	-4(a2),a0					; Offset to Hook Struct (Is this undocumented?)
	movea.l	h_Entry(a0),a6				; Find entry to execute method
	lea	mt_Method_Input,a1
	jsr	(a6)							; DoMethod();
All of this could be made easier for the coder by creating macros to generate specific types of objects and invoke methods, but for clarity and understanding, I’ve chosen not to include them in this source.
To sum it up, here’s a list of what needs to be done to build a MUI application:
Open “muimaster.library”
Build your application starting from the bottom objects and up while linking any child objects to it
Set attributes that only become valid after creating the application, such as opening a window.
Use DoMethod() to set notify and hooks to your objects
Run a minimalistic eventhandler loop that fetch Application_ReturnID_Quit by calling DoMethod() and waiting for signal
Clean up by a single call to MUI_DisposeObject()
Close “muimaster.library”
Finally, here’s a complete example of source code showing how to accomplish all of the above.
		; What: Example on how to display a message using EasyRequestArgs in Intuiiton.
		;
		; Author: Tomas Jacobsen - bedroomcoders.com
		; Date: January 2026
		; Version: 1.0


		opt d+							; Include debug information in file
		output	RAM:DisplayMessage				; Save program to RAM:

		incdir	"include:"
		include	"exec/exec_lib.i"
		include	"intuition/intuition_lib.i"
		include	"intuition/intuition.i"


		section my_code,code


		;Initialization
		;------------------------

_Init		movea.l	4.w,a6					; ExecBase in a6

		moveq	#0,d0							; 0 = any version of intuition, 39 = at least OS 3.0
		lea	_IntuitionName,a1
		jsr	_LVOOpenLibrary(a6)
		move.l	d0,_IntuitionBase
		beq.s	.libraryError

		movea.l	_IntuitionBase,a6
		suba.l	a0,a0						; Set a0=0 - Display on default screen
		lea	_EasyStruct,a1					; Pointer to structure in a1
		move.l	#es_SIZEOF,es_StructSize(a1)		; Fill in size in structure
		clr.l	es_Flags(a1)						; Set flags in structure to 0
		move.l	#_Title,es_Title(a1)			; Write a pointer to title into strucure
		move.l	#_Message,es_TextFormat(a1)		; Write a pointer to message into strucure
		move.l	#_OKMsg,es_GadgetFormat(a1)
		sub.l	a2,a2
		sub.l	a3,a3
		jsr	_LVOEasyRequestArgs(a6)

		movea.l	4.w,a6
		movea.l	_IntuitionBase,a1
		jsr	_LVOCloseLibrary(a6)

.libraryError
		moveq	#0,d0							; Return zero (no error) to the system
		rts


		section my_data,data

_IntuitionName		dc.b	"intuition.library",0
				even
_Title			dc.b	"My message",0
				even
_Message			dc.b	"This is a message from my assembler code.",0
				even
_OKMsg			dc.b	"OK",0
				even

_EasyStruct			ds.b	es_SIZEOF				; EasyStruct for Requesters
				even

_IntuitionBase		dc.l	0
An operating system serves as a bridge between the user and the computer’s hardware, while also providing routines and services that help applications run smoothly on the platform and take advantage of all the ready-made functionality the OS offers.
AmigaOS is no different, providing a rich set of routines you can tap into for your code. This made it far ahead of its time, and it’s still seen as both efficient and welcoming to coders and users alike.
Most routines are organized into libraries. For example, the intuition.library contains routines for managing windows and screens. If you need to open a file or read a directory in your code, the dos.library is the place to look. The graphics.library can help you draw a circle on the screen or animate an image by moving it around.
For a full guide to the built-in libraries, take a look at the official autodocs here:
Let’s dive in and explore how to work with all this functionality using assembler. To use a library’s contents, you first need to open it, and when you’re finished, close it properly. The one exception is the exec.library, which is always open and ready to use. This is the library that lets us open any other library.
movea.l 4.w,a6 ; At memory address 4 you will always find a pointer to ExecBase/SysBase
With ExecBase loaded in a6, we can call any of Exec’s functions. A library base is essentially a table of available functions, with the base pointing to the last one. To call a function, we use a negative offset from the base. Confusing, I know. An example is in order.
; Find ExecBase and use Exec's OpenLibrary funtion to open Intuition.
; Store IntuitionBase in a variable for later using it's functions.

_LVOOpenLibrary = -552
_LVOCloseLibrary = -414

Start:
		movea.l	4.w,a6			; ExecBase in a6
		lea	IntuitionName,a1	; Name of Intuition Library
		moveq	#0,d0			; Any version of the library is OK
		jsr	_LVOOpenLibrary(a6)	; Jump to Execbase - 552.
		move.l	d0,IntuitionBase	; Store IntuitionBase in memory

		; ... Lots of useful code ...

		movea.l	4.w,a6
		movea.l	IntuitionBase,a1	; Library to close
		jsr	_LVOCloseLibrary(a6)	; Always clean up and close after us.

		rts

IntuitionBase:	dc.l	0
IntuitionName:	dc.b	"intuition.library",0
		even
jsr _LVOOpenLibrary(a6) translates to jsr -552(a6), which means the CPU jumps to the address located 552 bytes before the address that a6 points to.
In the developer tools, you’ll come across include files—definitions you can add to your code that let you use function names instead of numbers. We’ll explore this in more detail in a later article. In the upcoming articles, you’ll also see more examples of how to use OS functions. It might feel a bit confusing at first, but it will start to click as you get more examples of how they’re used.
The Motorola 68000 CPU has about 50–60 basic instructions, each with variants that bring the total to around 150. If you’re coding for the 68080 CPU, you can multiply those numbers significantly. Luckily, you can get pretty far with just a few of the basic ones, and an understanding of variants. In this article, I’ll share just 12 commands that are all you need to build complete projects.
You only need 12 commands to code in assembler.
Even though the 68000 is a 16-bit CPU, moving at most 16 bits of memory in one go, it has a 32-bit internal architecture and appears as a 32-bit processor from a programmer’s perspective. From the 68020 onward, the CPUs in this series are true 32-bit. Instructions that read or write data have variants indicating the size of the data being processed. This is done by adding a suffix to the command.
instruction.b
Byte – 8 bits
instruction.w
Word – 16 bits
instruction.l
Long – 32 bits
Be careful to use the correct size when writing your code. Getting this wrong is one of the most common mistakes and can lead to tricky bugs. If you write a byte-sized value into a register, you have no idea what’s in the upper 24 bits. Reading that register as a long afterward might just give you a random number.
Here’s the list of the 12 most common instructions along with a couple of usage examples for each.
move
lea
add
sub
cmp
tst
btst
beq (and other branches)
dbf
jsr
bsr
rts
MOVE – The move command is used to move data to and from memory and registers.
Instruction
Example
Description
move.b
move.b #255,d0
Write the number 255 into the lower 8 bits of d0
move.w
move.w #$4ff,d0
Write the hexadecimal number 4ff into the lower 16-bits of d0
move.l
move.l a0,d0
move the address stored in a0 into d0
move.l (a0),d0
Move the content that a0 points to into d0.
move.l (a0)+,d0
Same as above, but modify a0 to point to the next address.
move.l (a0),(a1)
move the data that a0 point to, into the address that a1 points to.
moveq
moveq #200,d0
Move the number 200 into d0 with a quick command, but ensure the number is 8-bit. The operation still performs a 32-bit write to the register.
movea.l
movea.l d0,a0
move the content of d0 into address register a0
movea.l
a0,a1
move the content of a0 into a1
movem
movem.l d0-d2/a6,-(sp)
Move multiple. This example stores d0,d1,d2, and a6 on the stack.
The key takeaways are:
# is used to indicate a hardcoded number to be written; otherwise, it represents an address.
The $ symbol is used to indicate that the number is in hexadecimal format.
An address register in parentheses refers to the data stored at the address contained in the register.
MOVEA is used when the destination is an address register, but most assemblers will automatically convert MOVE to MOVEA during assembly.
LEA – Load Effective Address
The LEA command creates a pointer to an address and stores it into an address register.
Example
lea mydata,a0

mydata: dc.l 1000,2000,3000,0
Here we have a data section with some numbers. The LEA command will load the a0 register with the address where these numbers are stored. A movea.l mydata,a0, on the other hand, would place the actual number 1000 into a0. This is an important distinction.
Add – Mathematical addition.
Example
Description
add.l #50,d0
Add the content of d0 with 50
add.w #50,d0
Same as above, but only writes the lower 16-bits.
addq.l #5,d0
Add the content of d0 with 5. Quick command that only works with numbers between 1 and 8.
add.l d0,d1
Add the content of d0 to d1. result is stored in d1
adda.l #4,a0
Adding 4 to the address stored in a0. a0’s pointer have now been increased with 4 bytes.
Sub – Mathematical substraction.
Example
Description
sub.l #50,d0
Substracts the content of d0 with 50
sub.w #50,d0
Same as above, but only writes the lower 16-bits.
subq.l #5,d0
Substracts the content of d0 with 5. Quick command that only works with numbers between 1 and 8.
sub.l d0,d1
Substracts the content of d0 to d1. result is stored in d1
suba.l #4,a0
Substracts 4 to the address stored in a0. a0’s pointer have now been decreased with 4 bytes.
Tip: If you want to clear an address register, you can indeed use:
movea.l #0,a0
However, the same result can be achieved using sub, which would be quicker for the CPU to execute.
suba.l a0,a0
CMP – Compare two values and sets status flag
Example
Description
cmp.b #100,d0
Check if the lower 8 bits of d0 contain the value 100.
cmp.l #100,d0
Check if d0 (all 32 bits) contain the value 100.
cmp.l d0,d1
Check if the content of d0 is the same as in d1.
cmpa.l a0,a1
Check if content of a0 is the same as in a1
cmpm.l (a0),(a1)
Check if the data at the location a0 points to is the same as the data at the location a1 points to.
cmpi.l #100,(a0)
Check if the data at the location a0 points to is 100
CMP instructions are paired with branch commands like beq, bne, and others to handle conditions correctly.
Start:
	cmp.b	#'A',d0		        ; Does d0 contain the letter A?
	beq	.Afound	        	; Branch if equal to .Afound

	cmp.b 	#'B',d0		        ; Does d0 contain the letter B?
	beq	.BFound 		; Branch if equal to .BFound

	....
	....

.done
	rts				; Return from subroutine


.Afound	moveq	#0,d0
	bra	.done	        	;Branch always

.Bfound	moveq	#1,d0
	bra	.done    		; Branch always
TST – Test for 0 and set status flag
Example
Description
tst.l d0
Does d0 contain 0?
tst.b (a0)
Does the byte a0 points to contain 0?
TST is faster than using CMP to test for zero. Note that TST can not test an address register.
BTST – Bit Test – Test single bit for value 0
Example
Description
btst #7,d0
Does bit number 7 in d0 contain 0?
btst #20,d0
Does bit number 20 in d0 contain 0?
btst #6,$bfe001
Does bit number 6 at address $bfe001 contain 0 ?
Important: When testing a bit in a data register, you can use a number between 0 and 31. When testing directly in memory, it’s an 8-bit operation, so you’re checking the byte at the given address. In that case, you should use a number between 0 and 7.
Branches – A branch jumps to a specific location when a condition is met.
Example
Description
beq
Branch if equal to
bne
Branch if not equal to
bgt
Branch if greater than
bge
Branch if greater or equal to
blt
Branch if less than
ble
Branch if less or equal to
bra
Branch always
cmp.l d0,d1		; Compare d0 to d1
beq   .isEqual		; Jump if d0 and d1 have the same values
bgt   .isGreater	; Jump if d1 have a greater value than d0 does
blt   .isLess		; Jump if d1 have a lower value than d0 does
bne   .isNotEqual	; Jump if d0 and d1 are not equal.
DBF – Decrement and Branch if False.
This is your go-to command for creating loops that run a specific number of times. DBF decreases the data register by one and branches to the label if the register is not -1.
	moveq	#9,d0		; Loop 10 times (0-9)
.loop:
	; ... your code ...
	dbf	d0,.loop	; d0 = d0 -1, branch if d0 >= 0
JSR – Jump to Subroutine
This command lets you jump to a subroutine and return to the same point once it’s finished. In AmigaOS, it’s widely used for calling OS functions.
BSR – Branch to Subroutine
BSR works just like JSR, but it’s a more efficient command that can only jump up to 32KB from the current location. It’s commonly used to jump to your own subroutines within your code.
RTS – Return from Subroutine
RTS returns from a subroutine called by either JSR or BSR.
Start:
	moveq	#100,d0
	move.l	#5000,d1
	bsr	AddNumbers
	....				; d0 now contains the value 5100
	rts				; Exit this program


	; AddNumbers
	; INPUT: d0,d1 = numbers to add
	; OUTPUT: d0 = result
AddNumbers:
	add.l	d0,d1			; Adds d0 to d1
	move.l	d1,d0			; Move result to d0
	rts				; Return to line after the calling BSR
You’ve probably heard that computers are made up of bits and bytes—ones and zeros—that somehow transform into your favorite game or that lecturing email from your mother-in-law. And you’ve heard right. The basic building block of a computer’s memory is the bit, a tiny switch that’s either on or off, one or zero. Bits can be grouped together to form larger numbers. For example, combining 8 bits can represent values ranging from 0 to 255.
These numbers can represent data, like creating a picture of your dog or capturing waveform patterns in a pumping techno beat. They can also serve as instructions for the CPU to execute. The CPU reads these numbers and performs operations based on their meaning. This is machine code.
With machine code, a programmer can fully control the computer, writing programs that run at peak performance while keeping the code compact. But if a programmer only wrote numbers to make the computer do what he wanted, it would quickly become too difficult, and he would lose track of his program.
This is where assembler comes to the rescue. It provides a human-friendly layer on top of machine code. Each instruction still operates at the basic machine code level, but numbers are replaced with words that carry the exact same meaning.
0680 0000 0001
These numbers are the machine code that tells the CPU to add the number 1 to a register called d0.
add.l #1,d0
This is the same instruction written in assembly language, which the assembler will convert into the number shown above.
A real-time look at an assembler generating machine code.
As you can see, remembering these words is much easier than recalling the raw numbers. These translated cues are called mnemonics, a term derived from the Greek word “mnemonikos,” meaning “related to memory.”
Why learn assembler and low-level coding when you have options like C, Basic, or even Pascal? It’s a fair question. If you want to get your code up and running quickly, those other languages might be the better choice. But when it comes to optimizing that tight loop slowing down your application, assembler is the way to go. And maybe, like me, you’ll discover that assembler becomes your preferred programming language for almost everything.
Let’s look at some pros and cons to break it down.
Pro
Con
Fastest code.
Steep learning curve
Compact code.
Takes longer to finish projects.
Full control of all details.
More likely to create bugs in you code.
Fun and challenging.
It’s not as difficult once you’ve got some experience.
The Motorola 68K line of CPUs is probably among the most coder-friendly on the market, with its rich feature set and sensible syntax. This makes it an ideal choice for learning assembler coding, but be warned: once you understand the inner workings of the 68K, you might find yourself disliking the design of other CPUs. Switching from 68K to x86 coding is like trading your SUV for a kit car.
Are CPU’s magic?
A CPU isn’t magical, though it might seem like you need to master some arcane art to program one. It’s simply a unit that can move data around, store it in internal registers, and perform calculations. Once you understand the basics, it’s actually pretty straightforward.
The 68000 CPU features eight data registers, eight address registers, a Program Counter, and a Status Register. The 68080 CPU, found in Apollo computers, adds 40 extra registers for calculations and data storage. In the remaining articles of this series, the focus will be on the classic 68K, used in early Amiga, Atari, and Apple computers, the Sega Megadrive, and various other devices like laser printers, synthesizers, and medical equipment.
d0-d7 : 32 bit data registers
a0-a7 : 32 bit Address registers
pc    : 24 bit Program Counter
sr    : 16 bit Status Register
        Lower 8 bits are the Condition Control Register
        Higher 8 bits are system control bits
Next up are the CPU’s instructions. These are stored in memory and executed by the CPU one by one sequentially. The PC register always holds the address of the next instruction to run. Changing the value of the PC register will make the CPU jump to that memory location to execute code.
Address      Instruction
$f8000       moveq #10,d0
$f8002       moveq #5,d1     <- pc register = $f8004
$f8004       add.l d0,d1

These instructions happen to be two bytes each, but a 68K instruction can range from two to ten bytes in length.
In addition to showing how the CPU knows which instruction to execute next, the example also introduces two common commands: Move, for transferring data, and Add, for performing a mathematical addition. There are several variants of both these instructions, but explaining these details is beyond the scope of this article.
This is all well and good, but how does it turn into a real program a computer user can run? That’s where integration with the rest of the hardware comes in. The CPU, or Central Processing Unit, sits at the core of the hardware design, executing commands. By sending data to the screen buffer, it displays images on the screen, and by fetching data from I/O (input/output), it processes the user’s keyboard input.
For more information and a straightforward example, take a look at this article next.
If you’re looking to learn Motorola 680×0 Assembler for the Amiga computer and compatible systems like Apollo’s Vampire or Unicorn, you’ve come to the right place. This site offers a variety of resources for anyone interested in low-level coding.
To follow along, make sure your developer tools are set up and installed on your computer. For more details on how to do that, please see:
LINK
LINK
Now that you’re ready, let’s jump right in. I can guess what you’re thinking—another “Hello World” code example to kick off learning a new programming language.
In the Amiga world, we do things a bit differently. Here, we start by learning how to read input from the mouse’s left button, of course.
waitLoop:
          btst   #6,$bfe001
          bne.s  waitLoop
          rts
Now compi….. assemble the code, and run it. It will loop continuously until you click the left mouse button.
Let’s break it down and go over what each part means.
waitLoop:
This is a label, essentially a bookmark in the code pointing to this location. It’s not an instruction for the CPU, but a marker for the assembler to reference when generating actual machine code.
Labels must either end with a colon or be placed at the start of a line with no space before them to be recognized by the assembler, and they are case-sensitive.
btst #6,$bfe001
The “btst” instruction, short for “Bit Test,” is a real CPU command. Here, it’s checking bit number 6 at the memory address $bfe001. The outcome of this test is saved in the CPU’s Condition Code Register (CCR). Essentially, it’s used to determine if that specific bit is set to zero.
On the Amiga hardware platform, the system sets this particular bit to zero when the LMB is pressed; otherwise, it’s set to one.
bne.s waitLoop
BNE stands for “branch if not equal,” meaning that if the previous test doesn’t result in zero, the program jumps to the label waitLoop. You might have noticed the “.s” after BNE—this is an optimization, where “.s” means short. It’s used to create smaller code when the branch or jump is to a nearby address.
rts
RTS stands for “Return to Subroutine.” When our program is called by the operating system, we need the CPU to resume executing the OS’s own instructions; otherwise, the system will crash. In later articles, we’ll use the RTS command extensively when creating our own functions and subroutines.
There you have it—your first Amiga program, written in the programming language for hardcore bearded or bald guys. And if you happen to be a gal, you’re, of course, welcome to be a little less hairy.